Creating faculty/staff listings involves a few steps. First, you must create a Personnel Information for each person. If you are including an employee who is already listed in another department, you will still create the page, but you will pull in content from the other listing. Once that is created you will be able to add people to the listing pages. A Quick Guide PDF is also available.
- Create a Personnel Information item for every person that will be used on your website.
- Only create one Personnel Information item for each person within a site.
Step 1: Create New Personnel Information Item
There are two different kinds of personnel items you can create.
- Without a full page. In the listing, this person would not have a link on their name. This is typically used for staff or student employees, though not always.
- With a full page. In the listing, this person would have their name linked to a page with all of their information. There are some fields on the personnel item that will only show up on the person’s full page. This is typically used for faculty, directors, department heads, vice presidents, etc., though not always.
Without Full Page
This must be created for each employee that will be listed if they do not have a full-page listing. If you are including an employee who is already listed in another department or part of your website, you will still create this item, but you will make a special selection in the Step 2.
- From the Pages list view navigate to the folder in which you want to create the new personnel information page.
- Click on the +New button at the top of the page.
- Select the Personnel Information item.
- Page Title: Enter the person’s name.
- Description: This is the meta description for the page. Enter a description that at least includes the person’s name.
- Keywords: This is the meta keywords for the page. It is comma separated words or phrases that can have limited SEO benefits. At least enter the person’s name.
- Add Navigation Item: Choose whether or not to list the profile page in the navigation. Normally this should be set to No.
- Filename: If the personnel information item is the only .pcf file in the folder, enter “index” (without the quotation marks). If there are multiple .pcf files in the folder, enter the person’s last name or last name hyphen first initial.
- Leave the Access Group set to (Inherit from Parent).
- Click the Create button to create the item.
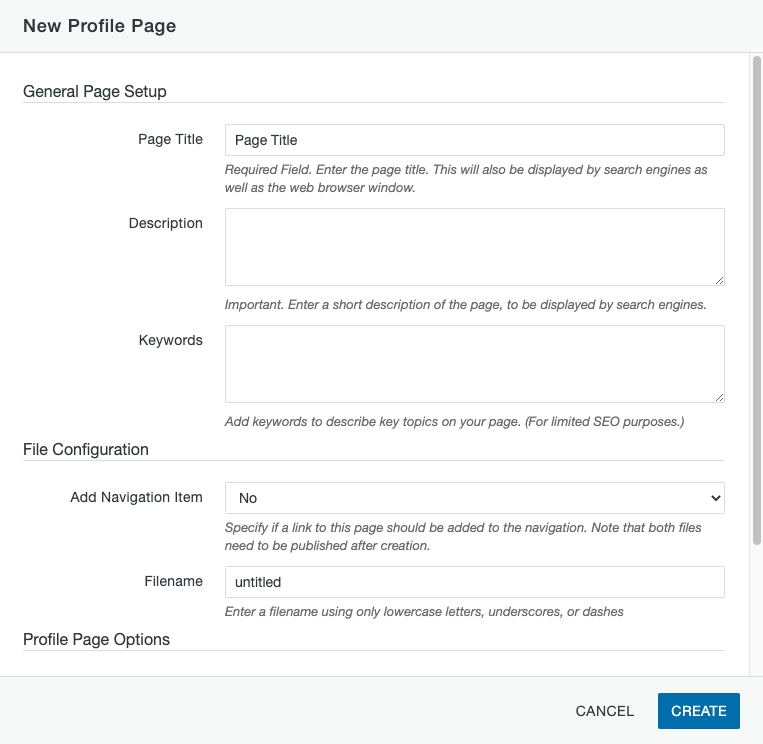
With Full Page Listing
This must be created for each employee that will be listed if they have a full-page listing. If you are including an employee who is already listed in another department or part of your website, you will still create this item, but you will make a special selection in Step 2.
- From the Pages list view navigate to the folder in which you want to create the new personnel information page.
- Click on the +New button at the top of the page.
- Select the Section w/Personnel item.
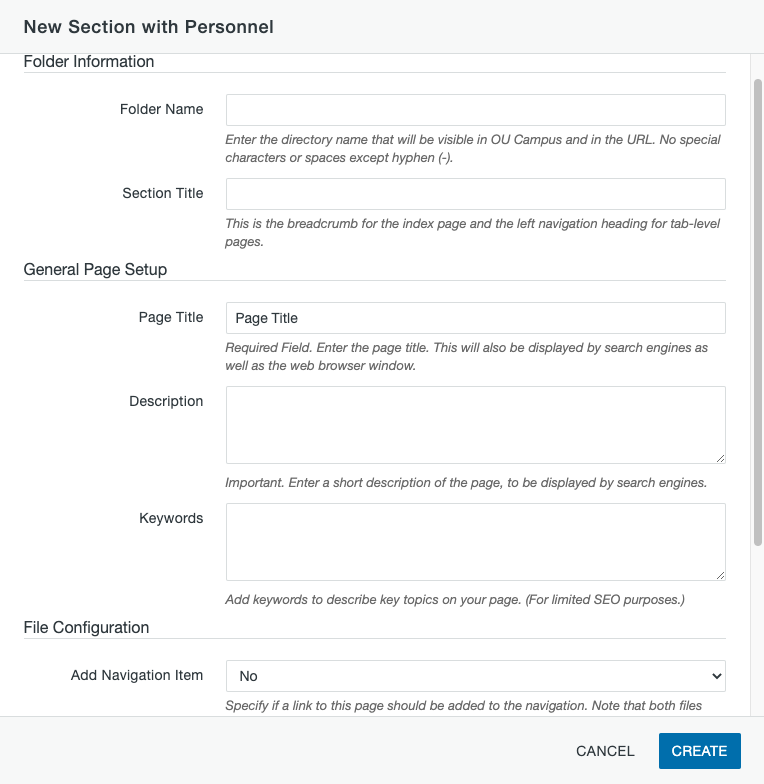
- Folder Name: Enter the person’s last name using all lowercase letters with no special characters or spaces except hyphen (-). If a person with this last name already exists, use the first initial of the first name hyphen (-) last name. This will become part of the person’s URL.
- Section Title: Used in the breadcrumb. This should be the person’s name.
- Page Title: Displayed at the top of the page, in the navigation, and in the metatitle. This should be the person’s name.
- Description: This is the meta description for the page. Enter a description that at least includes the person’s name.
- Keywords: This is the meta keywords for the page. It is comma separated words or phrases that can have limited SEO benefits. At least enter the person’s name.
- Add Navigation Item: Choose whether the page should appear in the navigation or not. Normally this should be set to No.
- Leave the Index Page Options as is.
- Click the Create button to create the item.
(Video has no sound.)
Step 2: Page Properties—Parameters
The Properties button in the Page Actions Toolbar near the top of the page contains information about the page. You must have the page checked out to see all the options.
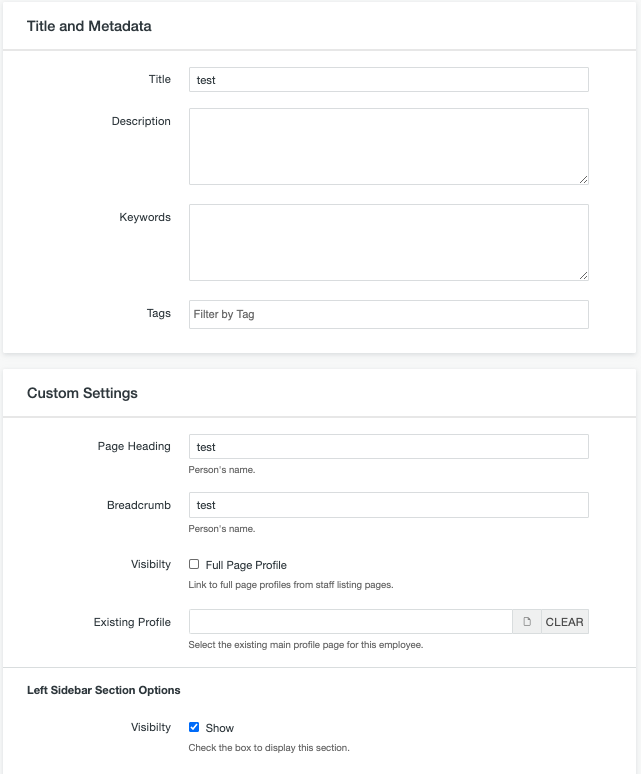
A Personnel Information item will have the following parameters.
- Title: This is used as the page title for full page listings. Usually the person’s name.
- Description: This is the meta description for the page. You should include the person’s name at a minimum.
- Keywords: User-defined keywords that are used in searches to help find content and for SEO purposes. You should include the person’s name at a minimum.
- Tags: Used within Modern Campus CMS to categorize pages and files so that it is easier to search for and filter them.
- Page Heading: Usually the person’s name.
- Breadcrumb: Usually the person’s name. If the page you are editing has a filename of index.pcf this field is not used. For additional pages within a folder that are named something other than index.pcf this field will set the page breadcrumb (in the light grey space at the top of the page below the site title).
- Visibility Full Page Profile: Check this box if you want the faculty or staff to have a full page that is linked to from the listing.
- Existing Profile: If you are including an employee who is already listed in another department, you can select that profile page using the icon next to this field in order to pull the content from that profile. Click through the folders to the correct location (you can search for the person on mtu.edu to find out where their item is), select their pcf file, then choose the HTML option. If you use this field, you are then done creating the item. Save the changes and skip to Step 5 to publish the item.
- Left Sidebar Section Options: Uncheck this box if you need to turn off the left sidebar on the full-page listing.
Save your changes.
Existing Content
Does the person you are creating in your site already exist in another site in the CMS or section of your website? If so, you can pull in that existing content and not have to recreate it using the Existing Profile field in Step 2. When the information on the home department personnel information item is updated, it will be updated in your site automatically.
(Video has no sound.)
Step 3: Page Properties—MultiEdit Content
The Properties button in the Page Actions Toolbar near the top of the page contains information about the page. You must have the page checked out to you to see all the options.
If you are pulling information from an existing profile, you will not need to edit any of these fields. You will use the Existing Profile field in Parameters (Step 2) instead.
At a minimum, you must enter a first name, last name, and email or userid.
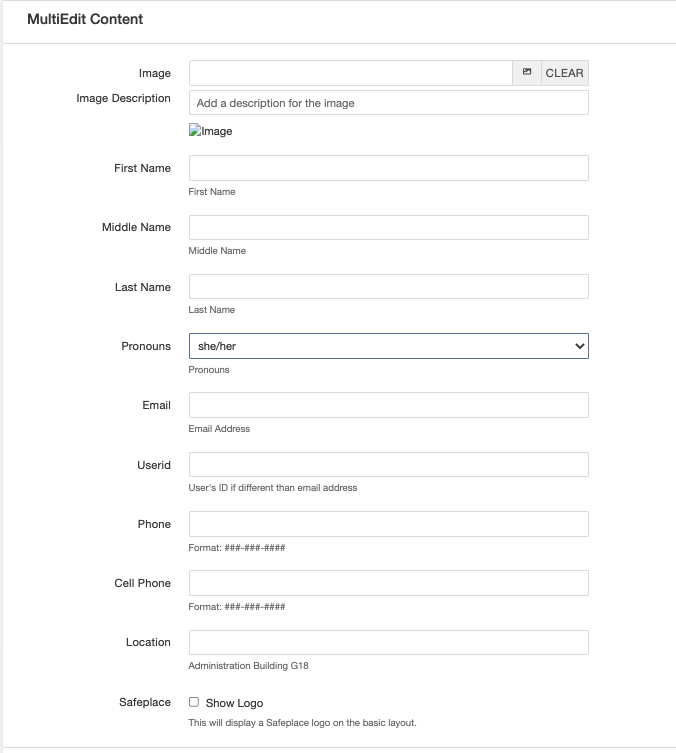
- Image: After creating a Personnel image type using the Image Editor, select the largest size personnel image using the icon next to the Image field.
- Image Description: Put the person’s name in this field.
- First Name: Employee’s first name.
- Middle Name: Employee’s middle name, if desired.
- Last Name: Employee’s last name.
- Pronouns: Select the employee’s desired pronouns.
- Email: Employee’s email address.
- Userid: Employee’s userid if it is different than that in the email address you entered.
- Phone: Employee’s phone number in the format ###-###-####.
- Cell Phone: Employee’s cell phone number in the format ###-###-####.
- Location: Employee’s office location, put the building name first followed by the room number.
- Safeplace: Check the box if the person has been through ally training to display the Safe Place logo on their full page listing and the basic staff listing.

- Titles: Enter up to three titles for the employee.
- Education (full page only): Enter up to four degrees for the employee, if desired.
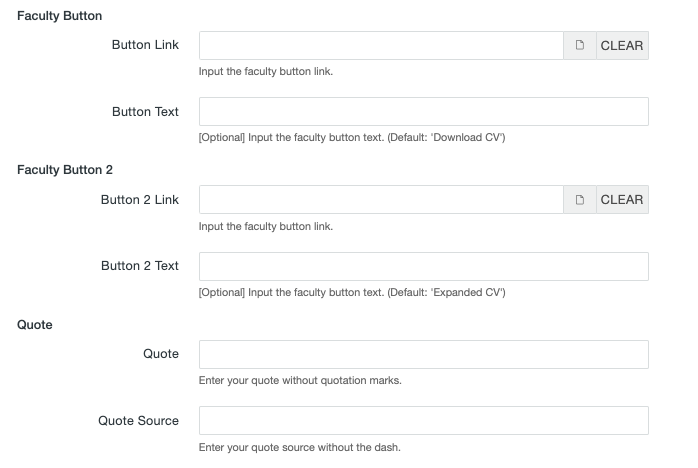
- Faculty Button (full page only): This is where you can set up the button for downloading the faculty CV. After uploading the CV file, select it by using the icon next to the Button Link field. If you want the button text to be something other than “Download CV,” enter the text in the Button Text field.
- Faculty Button 2 (full page only): This is where you can set up a second button for downloading an additional CV. After uploading the CV file, select it by using the icon next to the Button Link field. If you want the button text to be something other than “Expanded CV,” enter the text in the Button Text field.
- Quote: Enter a quote. Quotation marks will automatically be added.
- Quote Source: Enter the source for the quote. The dash will automatically be added.
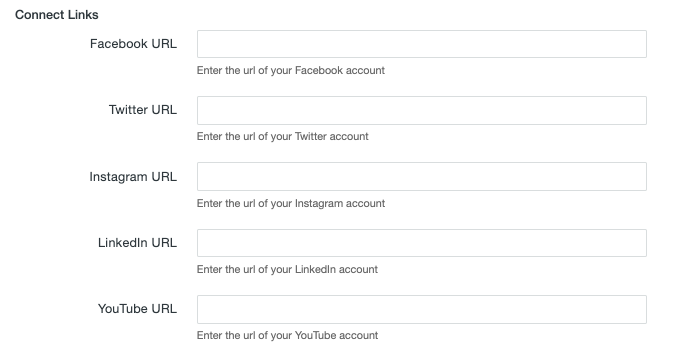
- Connect Links: Enter the URL of various personal social media accounts to have icons show up on the full-page listing.
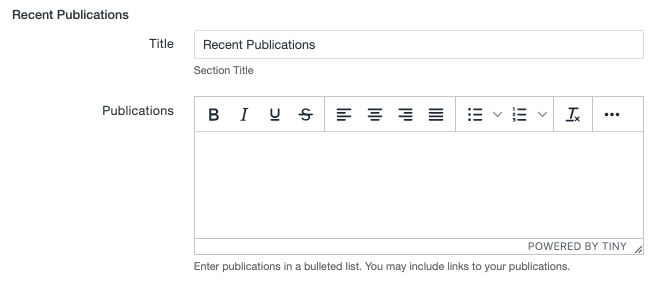
- Recent Publications (full page only): Enter the title for the publications section in the Title field. List the publications in a bulleted list in the Publications field. You can include links.
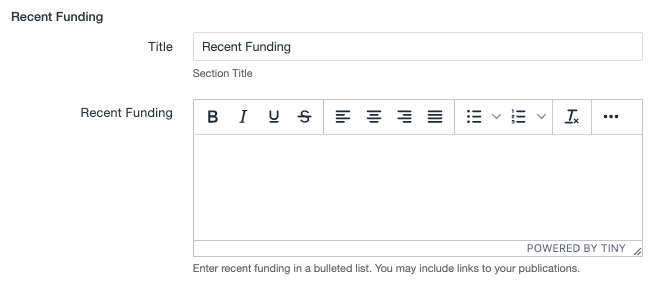
- Recent Funding (full page only): Enter the title for the recent funding section in the Title field. List the funding in a bulleted list in the Recent Funding field. You can include links.
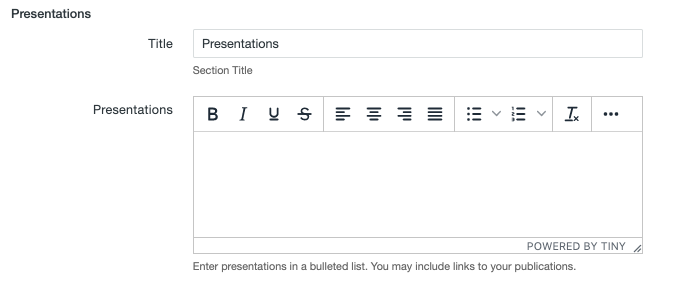
- Presentations (full page only): Enter the title for the presentations section in the Title field. List the presentations in a bulleted list in the Publications field. You can include links.
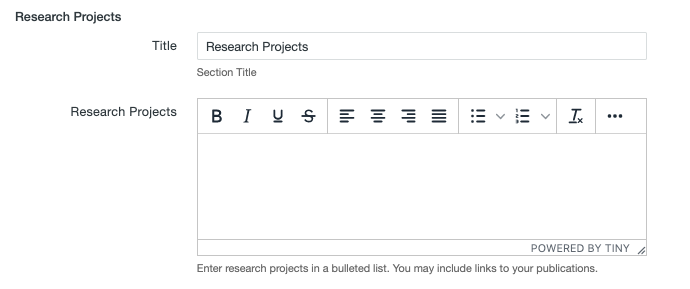
- Research Projects (full page only): Enter the title for the recent projects section in the Title field. List the projects in a bulleted list in the Research Projects field. You can include links.
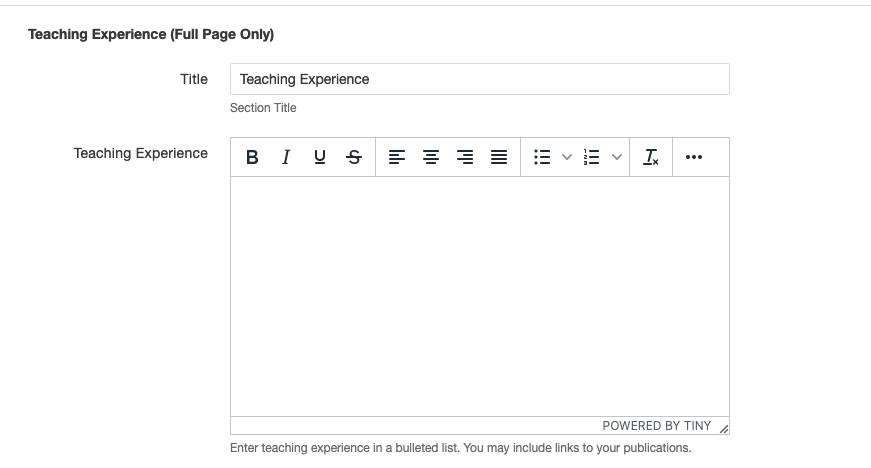
- Teaching Experience (full page only): Enter the title for the teaching experience section in the Title field. List the experience in a bulleted list in the Teaching Experience field. You can include links.
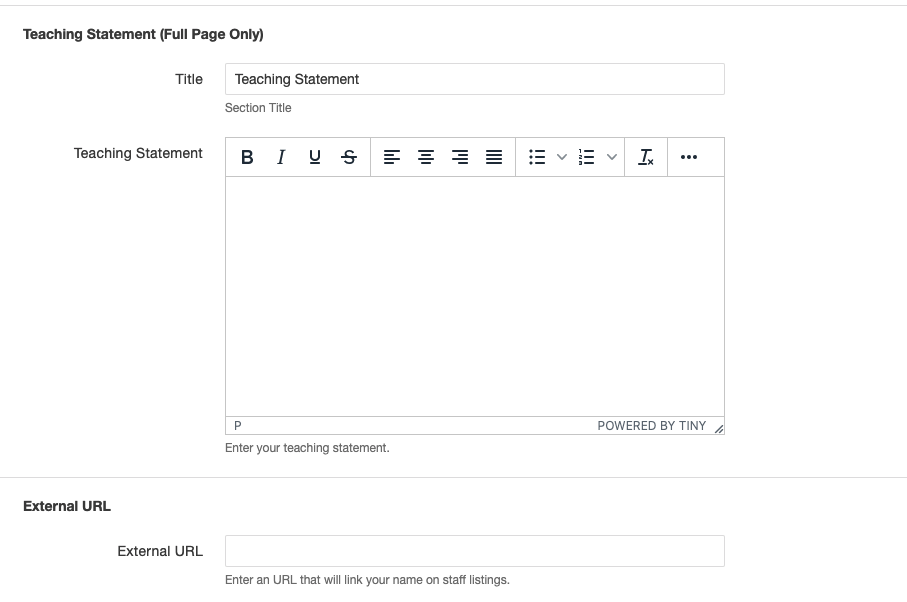
- Teaching Statement (full page only): Enter the title for the teaching statement section in the Title field. Enter the statement in the Teaching Statement field. The teaching statement field gives faculty and instructors an opportunity to comment on their teaching philosophy and interests to their on-campus and online students.
- External URL (full page only): If the person’s name on the listing page should link to a page other than a full-page profile within the current site, enter the full URL of that destination page.
Save your changes.
Step 4: Editable Regions
There are nine editable regions for Personnel Information—Biography Title, Biography, Specialties Left Title, Specialties Left, Extra Specialties Left Title, Extra Specialties Left Specialties Right Title, Specialties Right, and Main Content. If you are pulling information from an existing profile, you will not need to edit any of the regions. You will use a special field in Parameters (Step 2) instead.
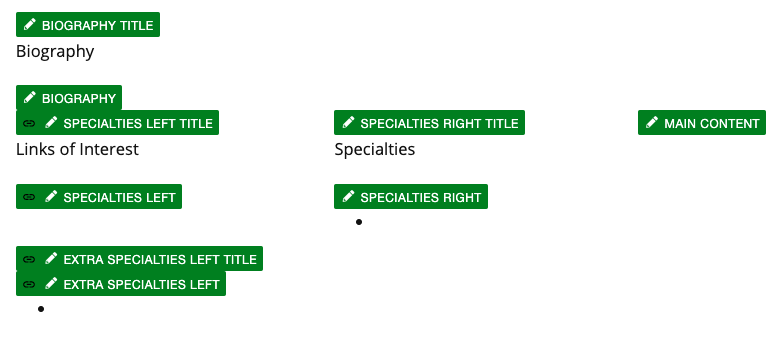
Clicking on a green Editable Region button allows you to edit that area. Use the Save and Exit button to save your changes and be able to select another editable region.
- Biography Title (full page only): This is where you will set the heading for what is normally the Biography section.
- Biography (full page only): This is where the biography content will be entered.
- Specialties Left Title: This is the heading for the Specialties Left content.
- Specialties Left: This region can be used for Links of Interest, Areas of Expertise, or other content. Use bulleted lists as needed. This will be the upper list on the left.
- Extra Specialties Left Title: This is the heading for the Extra Specialties Left content.
- Extra Specialties Left: This region can be used for Links of Interest, Areas of Expertise, or other content. Use bulleted lists as needed. This will be the lower list on the left.
- Specialties Right Title: This is the heading for the Specialties Right content.
- Specialties Right: This region can be used for Research Interests, Job Responsibilities, or other content. Use bulleted lists as needed. This will be the list on the right.
- Main Content (full page only): This region of content will appear at the very bottom of the page.
Step 5: Publish
Publish. If you created a Section w/Personnel for a full page listing, be sure to publish all of the pieces from the Pages List View.
Changing From a non-Full Page Listing to Full Page
If you have a personnel item that currently does not have a full page listing and you need to change it to a full page listing there are a few steps to take. The current layout is most likely a .pcf file with the person’s name as the filename in a folder with other personnel items. The goal is to have this pcf item named index.pcf in its own folder named with the person’s name along with a _props file and _nav file. If your personnel item is already in its own folder and called index.pcf you can just change the checkbox for the full page listing on the Parameters screen.
- Create a new Section w/Personnel following the instructions at the beginning of this post.
- When the page opens, return to the Pages List View and recycle the index.pcf item.
- Find the current personnel item for the person (name.pcf file) in Pages List View.
- Open the More Actions menu (…), go to the File menu, and choose Move or select the line and choose Move from the top menu.
- On the Move screen select the new folder that was created for the person when you made the new Section w/Personnel and click the blue Move button.
- Go into the folder where you moved the personnel item to.
- Rename the name.pcf file to be index.pcf.
- Create a new folder within the person’s folder called images.
- Find the person’s images and move them to the new images folder using the same process as when you moved the .pcf file.
- Publish the images in the new location.
- Publish the index.pcf, _nav.shtml, and _props.pcf files.
- Wait two minutes and publish any pages pulling in this person with one of the Faculty/Staff snippets.
Changing From a Full Page Listing to Not Full Page
To change someone from having a full page listing to not having one, you only need to uncheck the Full Page Profile checkbox on the Parameters screen.
Using Personnel Items on a Page
Personnel Information Item content is displayed on other pages by using the Faculty/Staff Content Single snippet or the Faculty/Staff Listing Multiple snippet. The content in the personnel information is stored in a database and the snippets pull the information from the database, not directly from the CMS.
The pages using these snippets are cached for a day to speed up load times. For this reason, in order for the new or updated content to appear immediately you must follow a couple additional steps to clear the cache and pull in the new information.
- Wait two full minutes after publishing the personnel item.
- Publish any pages where this person is displayed using the Faculty/Staff snippets.
In the worst-case scenario, if you forget to publish out the listing page(s), the new or updated content would automatically be pulled in overnight and would appear on the page the following day.