Tag: Huskycast

Editing a Video

We have all been busy lately making recordings -whether its pre-recording a lecture from your office or recording a live Zoom class session. Afterwards, we upload these recordings into the appropriate Panopto-Huskycast course folder for students to view.

Have you ever gone back and reviewed the video only to realize that the first couple minutes of the recording consisted of you still getting prepared to start your lecture or maybe the last couple minutes consisted of addressing some students’ personal questions….wouldn’t it be nice if you could quickly trim those unnecessary beginning or endings off of your recordings? Panopto-Huskycast provides a video editor within your video library which will allow you to quickly trim a section of content from your video.

Panopto Editor

Edit mode in Panopto

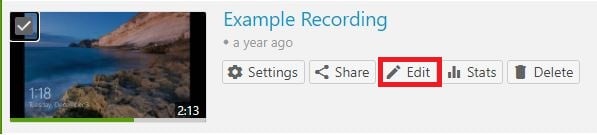
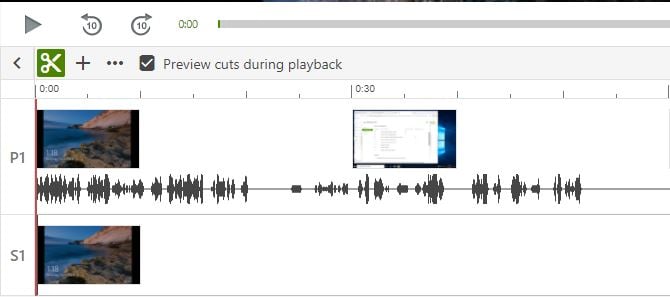
Login to Huskycast.mtu.edu with your Canvas credentials and find a video in your video library that you would like to edit. Hover your mouse over the video, you will notice some additional options appear including ‘Edit’. Click on ‘edit’ and the video will then open into the Panopto Editor. At the bottom of the editor, you will see a separate row for each stream captured in the video. A stream can be defined as a separate section in the editor for each video, audio or presentation content you recorded.

Panopto Editor video streams

Cut Tool

You will notice a scissors in the upper left corner just above the video streams. This is known as the cut tool and is used to trim content from the video. Let’s say you wanted to trim off the first two minutes and 14secs of your video. You would play the video and pause it after two minutes and 14 seconds. You will notice a red vertical line in the stream designating this point in the video. Next, click on the scissors. You will notice a dark gray line at the beginning and ending of the video stream. Click and drag the dark gray line at the beginning of the stream until it meets up with the red vertical line.

Select ‘Apply’ in the upper right corner of the screen when you have your edits defined. This will apply the changes. As a side note, the Panopto Editor is non-destructive…you can always add those cuts back in if you ever need to or happen to cut out the wrong content!

Additional Resources

How to edit a video

How to trim a video in the editor (including steps on trimming an individual stream)

If you would like additional support with managing your Panopto-Huskycast recordings, contact us at elearning@mtu.edu.

Three Huskycast features you should know about

Huskycast

Huskycast is Michigan Tech’s branded Panopto video platform. In the years leading up to the pandemic we saw a steady increase in video usage, both in lecture capture recordings and in content uploaded to the system. With the dramatic shift to remote instruction over the last year video usage has exploded (not surprisingly). With more users than ever creating and/or viewing content in Huskycast let’s review three great features that you may not know about.

Panopto-Zoom Integration

Many instructors are using Zoom to provide a synchronous remote environment for their course meetings. The ability to record Zoom sessions is a great way to allow students to review the class sessions again, or to catch up on sessions they may have missed. With the use of a recurring Zoom cloud meeting instructors can automatically have their recordings transferred to a designated Huskycast course folder in Canvas. This can save you lots of time managing content between Zoom and Huskycast and all students enrolled in the associated Canvas course automatically have access to view the recordings. You don’t need to manually share links to the recordings either, since students can just click on the Huskycast course link and select the recording they wish to view. You can learn more about this integration and contact elearning with any questions. Don’t forget to enable the audio-transcript option in your Zoom recording so that a transcript file will transfer to Huskycast along with the Zoom recording.

Video Assignments

Looking to provide your students with an alternative mode for demonstrating competency of your course objectives (multiple means of action and expression)? Why not consider using video? Huskycast allows instructors to create video-based assignments that students can submit directly in Canvas. Students can use the available recording tools in Huskycast to create their video, use other video software, or just record on their phone. When they’re ready they can upload the video either directly in the Canvas video assignment, or into the Huskycast assignment folder in the course. By default student-submitted videos are viewable by only the instructor (and the submitting student), but you have the option to allow other students to view and comment on videos if desired. Some examples of effective video assignments:

  • Student introductions
  • Video-based discussion post
  • Multimedia-based final project presentation
  • Student teach-back session (students explain new concepts they recently learned)

Embedded Quizzes

A low-stakes knowledge check can be a good pedagogical tool for measuring student comprehension during instruction. In Huskycast you can add a quiz and ask one or more questions within your videos. This quiz allows learners to verify comprehension and can give them confidence to learn deeper. When building the quiz you can require correct answers before moving on, or just provide correct answers. You can even create Canvas assignments tied to a Huskycast quiz and have the points earner for correct responses be recorded in the Canvas grade book. Multiple choice, multiple answer, true/false, and fill in the blank questions types are available in Panopto-Huskycast quizzes.

Resources

Need Help?

Contact the elearning support team in the Jackson Center for Teaching and Learning if you have questions about Canvas, Huskycast, Zoom or other educational technology tools.

elearning@mtu.edu | 487-3000