Preflight profiles in Adobe Acrobat® Pro can be used to check properties of a PDF document, as well as make some automatic fixes to them. In this tutorial, we’ll show you how to use preflight profiles developed by the Graduate School to check the image quality in a PDF file.
To begin, download a preflight profile and save it to your computer. Depending on your browser settings, you might need to right click on the link to save the file to your computer as a *.kfp (or*.xml) file. The Graduate School has created the four below:
- Graduate School All Items will show you all items that have errors (red “x”) or should be examined (yellow exclamation point). It includes checking page size (red “x”), embedded fonts (red “x”), type 3 fonts (red “x”), image quality (yellow exclamation point), and color images (only important if saving printing costs is a concern for you). This is the same checker that the Graduate School uses.
- Graduate School Embedded Fonts will show you all of the fonts that aren’t embedded and where type 3 fonts are used.
- Graduate School Images will show you which images have a resolution below 300ppi.
- Graduate School Color Pages will show you which pages are in color.
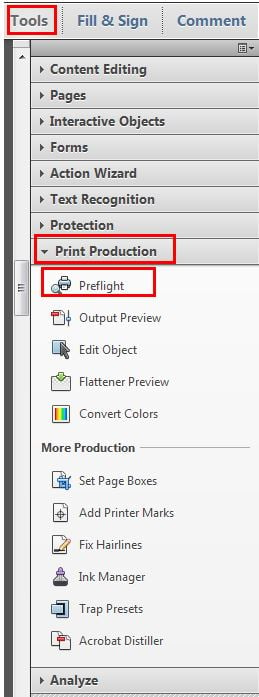
First, you need to open the preflight tool. In Adobe Acrobat® XI Pro, the preflight tool is located in the “Print Production” section of the “Tools.”
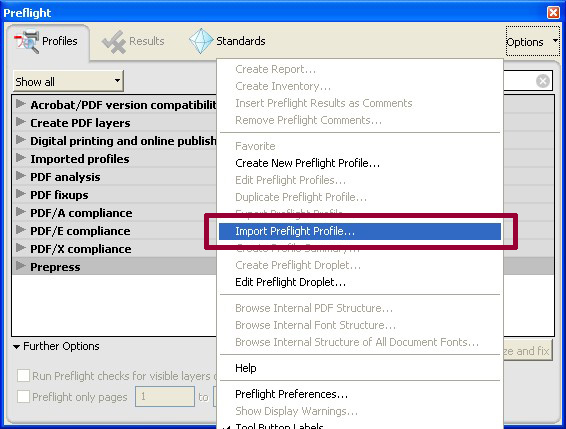
The first time, you will need to import the profile created by the Graduate School. Press the options button, and select “Import Preflight Profile….”
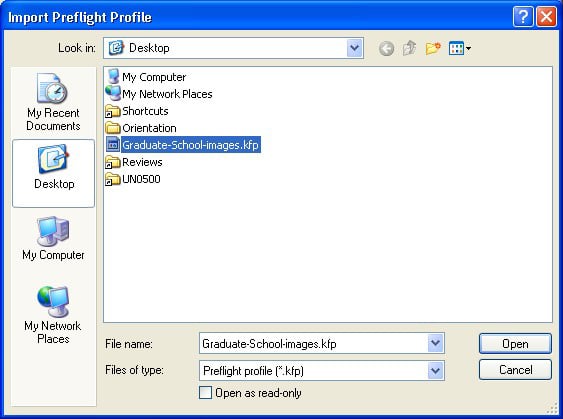
Find the *.kfp file where you saved it on your computer and click the “Open” button. Note that if you saved the file as an XML file, you will need to select “All Types” in the “Files of Type” drop down menu.
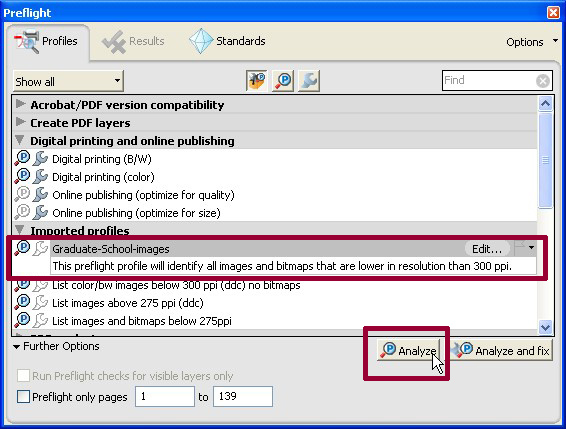
Highlight the profile, and click on the “Analyze” button. In this example, we’re checking the resolution of images in our document.
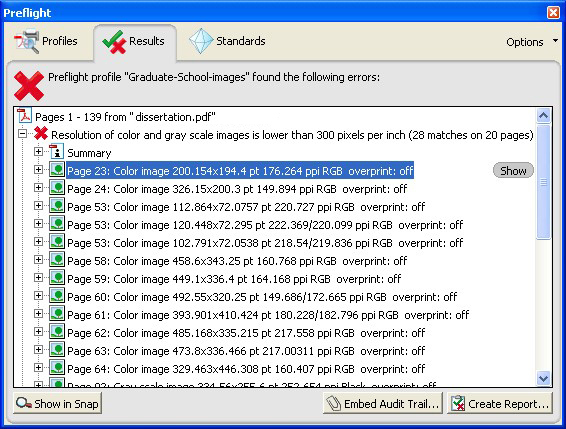
When the profile is complete, the results tab will show the total number of errors, and a list of where they are. Note that the pixel size and resolution of the image is listed – the image highlighted in blue is 176 ppi, which is significantly below our requirements for 300 ppi images. Double click on any item to see it in the PDF file.
For some LaTeX files, the Graduate School has seen extraneous matches to bitmap images. These images are generally horizontal lines in equations. The preflight profile can be edited to only check color and gray scale images, if desired.