Styles in Word are used to format text consistently throughout your document. Each paragraph may have a single style applied to it. For each paragraph, styles define the:
- Appearance of the text (bold, bulleted, size, font, etc.)
- Behavior of the paragraph (does it stay with the next paragraph? Have a page break before it?)
- Structure of the document (is this a heading meant for the table of contents?)
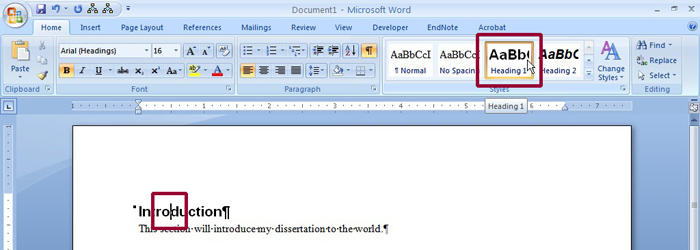
Styles are found on the Home tab of Word, in the Styles section (boxed in the figure below).

- Style set changes the default set of attributes for the built in styles. You can choose a “Distinctive” set, or the standard “Word 2007” set.
- Colors changes the default color scheme for your fonts.
- Fonts allows you to select a set of fonts to apply to the styles. For example, the “Normal” font in Word 2007 is Calibri, but in Word 2003, it was Times New Roman. If you prefer the default fonts from a previous version of Word, or want to define your own, select this option.
- Set as default makes any of the above choices the default for new documents created in Word. Note that these changes may not remain fixed in a network environment.

To apply a font, place your cursor within the paragraph. In the picture below, the cursor is between the “o” and “d” in introduction. Then, click on the desired style. In this case, I have selected “Heading 1.” Note that as you roll over each style, the text will change to match the preview text for the style.

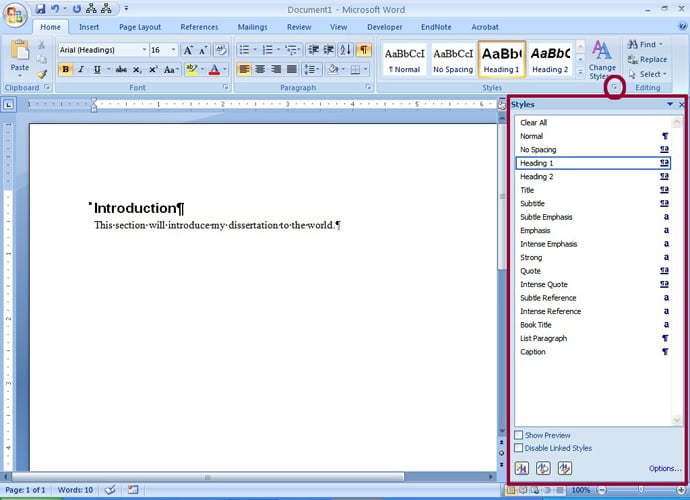
Sometimes, it is difficult to scroll through the large preview icons in the Home tab, and a simple list of styles is easier to work with. In this case, click on the circled icon in the figure below to display the boxed Styles window. This window has other helpful tools that will be explored in future blog posts.
