Author: Megan Ross

Network Drive 5S Best Practices

Most people practicing Lean know 5S–Sort, Set, Shine, Standardize and Sustain–and they know it can be applied to many things. Here at Michigan Tech we have applied this thinking to shared network storage spaces. I have now facilitated 4 of these events.

At the first one I facilitated, I obediently followed what I was taught and started with Sort. We went through all the files and worked on deleting the garbage. For Set, we worked on putting the remaining files into a logical order and making things easier to find.  Shine involved going back through the files (again) and renaming them consistently. When we came to the Standardize step it basically turned into documenting what we had spent a lot of time doing–what should be kept, for how long, where to store things, and naming conventions. Finally, the Sustain phase, including setting up regular audit schedules and procedures for making sure the drive stayed neat and organized.

In the end we did leave with a well-organized, easier to navigate shared drive, but the process itself was frustrating and extremely long. The team spent an inordinate amount of time during the Sort and Set phases strongly “discussing” whether a specific file should be kept or deleted and what folder it should be in. We also did think of metrics, kind of. We looked at the overall size of the share and, in the end, did make it smaller. But if you are only measuring the size of the share and your goal is to minimize it, then the simple answer to achieve perfection of that measurement is to just delete everything and use zero GB, right?

Around that time, I read an article, “5S Shakeup” by John Casey on the Quality Progress website, and had a revelation–perhaps we should be starting with the 4th S instead. On my next network drive 5S event I was able to try this out. We started by creating the standards document. I began this discussion off with one simple question–what is the purpose of this drive? We talked in general about what should be kept at all, how long to keep files, and how to name them. This completely focused the whole event and eliminated the extended discussions on specific items. The Sort, Set, and Shine could all be done in one pass through because the rules were already defined, and these steps were split up and done as homework instead of in a big group. The individuals returned to the next meeting with just a few files they were uncertain about, and the group made decisions on their disposition together.

I also worked on the metrics. At the pre-meeting with the team leader, we dug more into why they wanted to attack this problem. This helped to identify various metrics that would actually measure what they needed them to. If the why was because new staff can’t find things easily, we did several before and after time tests to see how long it took to find various files.  If the problem involved just too much stuff, we still looked at the overall size, keeping in mind that zero is not really the goal, but more like reduce and then maintain that reduced size. We looked at the number of root folders, total number of folders and total number of files.

This event went much smoother, and I heard a lot of comments from the team members that they really enjoyed the experience.  When another campus facilitator was slated to do one of these events she asked me for some tips as she knew I had done a few, so that prompted me to write some Best Practices, which I have made available here: Network Drive 5S Best Practices January 2014.
Reinventing ICE?

We are pleased to present this  guest blog post by Megan Ross, Business Analyst in Auxiliary Services and campus Lean Facilitator.

As a Business Analyst I have many “projects” that come across my desk, my work.  Some of these so-called projects are really just things that I need to do and be done with while others require a lot of time, effort and need some further prioritization.  I have been tracking “What’s Happening” in a Smartsheet, which I have been using as a kind of overall personal kanban.  I can see what things I have on my plate, what department it is for, when the work started and some notes about where it is currently at.  My boss and I also began using Trello for kanbans on bigger projects that show all of the little tasks, due dates, etc.  This still didn’t help to prioritize all those things on my plate in the Smartsheet.  What work should I be spending my time on?

The next phase in the evolution of my personal kanban was to add in a status column on Smartsheet.  Great!  Now I can see if I am actively working on it, it is just an idea, someone outside is working on it, it’s not started yet, or I’m waiting for a reply.  I also put in a column with a follow up date and set up a reminder based on that date.  This eliminates the need for me to constantly review everything on the sheet.  I just need to wait for the reminders on the Waiting for Reply or Outside Work Happening statuses.  But I still have all of the Active work and Not Yet Started Work.  What do I work on now?

Smartsheet

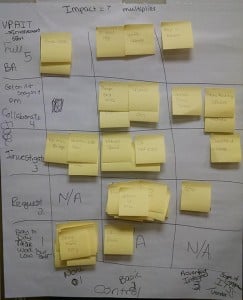
I started playing around with assigning a type to each piece of work.  My first thoughts were categories ranging from “Just Do It” items which would be simple tasks that I could just work on to “projects” which were some vague amount bigger in scope and outside involvement.  I took all of the current things on my list, put them on sticky notes and tried to put them into these categories, but it just didn’t work.  The categories were not quite right and some items didn’t fit in any or fit in more than one.  Then it hit me…there were two criteria that I was gauging each item on, but I was trying to combine them into one!  This started a brainstorm session with my boss.  We spent about an hour hashing things out and then fitting those sticky notes into my new matrix.

The first criteria is how much involvement, effort, or work the item is for me personally.  Is it just day-to-day tasks that I need to work on, a request I need to make on someone’s behalf, doing a little bit of investigative work, collaborating with others, or an in-depth analysis of something?  The second criteria is how much outside engagement is needed for this item from none to basic to advanced.  Now I have a matrix!

IMG_20140825_072752829

Some of the sections still have a lot of sticky notes in them, so I still needed a way to refine them.  I realized that each one comes with some kind of priority or impact level assigned either by the requesting department or myself.  This could be a multiplier added into the mix.  That was when it hit me.  I just recreated the ICE prioritization tool in my own words!  (For those of you without a Michigan Tech login to view the Quick Point, ICE is a lean tool normally used to prioritize countermeasures.  You rate the countermeasure on the Impact it will have, the Control you have over it, and the Ease of implementation, multiply the numbers together and get a ranking.  You can also check out the ICE Rap that one of our former student employees made about a year ago.)  For my matrix, my level of involvement or effort relates to the ease – how easy is it for me to get done, control is the level of outside entity engagement and the impact is that priority multiplier.  I am now moving forward with refining my prioritization and learning what the numbers actually mean.

Sometimes you have to work through it on your own and in your own language to really understand something.  The other lesson I learned is that the tools and methods we learn that we call Lean or Six Sigma or any other title you give it can be applied in many different ways.  Just because you learn about ICE as a tool for prioritizing countermeasures doesn’t mean that is where its application ends.  I certainly wasn’t thinking of how to prioritize my work as a “Lean” project!  It is about the way of thinking and applying that learning in all kinds of other ways that really has value.

Lean Best Practices are Everywhere… Once You Learn to See Them

We are pleased to present this guest blog by Rick Berkey, Research Engineer II and Product Development Manager, as well as a campus Lean Facilitator.

I recently purchased a lawn dethatcher online and was anxious to assemble it when I got home from work yesterday. When I opened the package, I was expecting the usual bag of parts and fasteners that fly everywhere when you rip open the industrial strength plastic packaging. If you’re like me, you also know instructions can be more like ‘suggestions’ — you look at bad illustrations, use your judgment, sort through parts that look close enough, skip important steps because you think you know the correct way, then take things apart once you realize you really don’t… and of course you end up with missing pieces or extra parts that you store as ‘just in case’ inventory. If only we had enough ‘junk drawers’ in our homes!

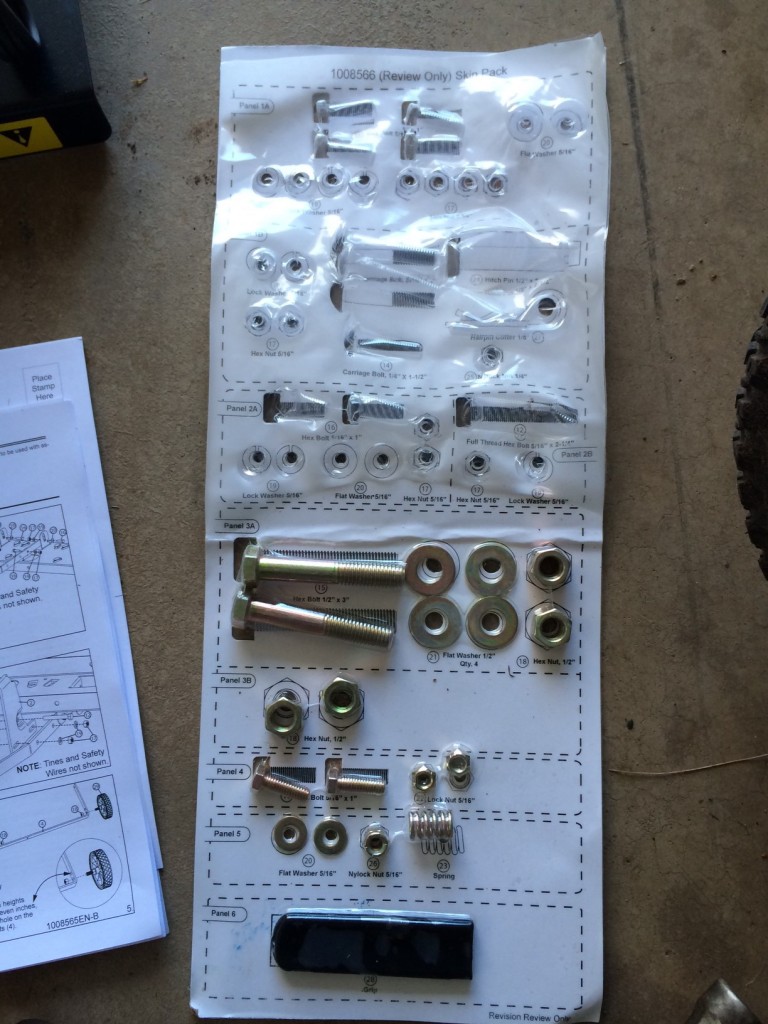
Instead, I was pleasantly surprised to find a great application of Lean (see image). All parts and fasteners are arranged on a ‘shadowboard’. Each panel was clearly labeled according to the sequential assembly steps provided in the instruction sheet. This simple yet effective solution highlights several Lean principles. First, it is centered around defining value in the eyes of the customer – i.e. making it easier for the person assembling it. Second, it embraces the 5S concept of establishing ‘a place for everything and everything in its place’. Third, it serves as an effective visual control for the assembly process.

As the customer, I experienced several benefits and hence derived value as follows:

1. Knowing I had all the parts BEFORE I began…and if for some reason a part were missing, it would be obvious at the start

2. It was difficult NOT to follow instructions…the shadowboard keeps you on task. This can also be seen as an example of Poka-Yoke or mistake proofing

3. Faster assembly time, by reducing the following wastes: motion (looking for parts), defects (using wrong parts for a given step)

4. No missing/extra parts at the end…wow!

Kudos to Brinly-Hardy for getting it right with their product. The time and aggravation I saved was channeled into USING the product…after all, the goal was to dethatch my lawn, not assemble a dethatcher. Now, I know we’re not assembling dethatchers here on campus (well, maybe the Grounds department is!), but I would challenge all of us to see how these principles can and do apply to the things we do every day. Some questions to consider in your daily work: Who is your customer, and how to they define ‘value’? Is your work helping to create value or is it creating additional waste? Is there a visual solution that can streamline the process? When you develop and improve work processes, have you considered mistake proofing methods to make it easier to do it right the first time (by making it hard to do it incorrectly)?


Feel free to comment, and in the meantime I need to finish raking all that dead grass!

The shadowboard that helped error proof dethatcher assembly.

Making Safety a Part of Your Lean Practice

Implementing safety and Lean together can help your organization increase productivity by reducing the wastes associated with a hazardous environment. Lean and other continuous improvement methodologies enable a safety-focused environment, by using problem solving and root cause analysis to correct the true cause of safety hazards in the workplace.

Here are some examples of how you can use Lean to make improvements to safety and increase safety awareness in your workplace:

  • Reducing excess inventory helps increase floor space and reduces potential tripping hazards. Other safety related to storage solutions might include avoiding piling boxes or other supplies on top of filing cabinets, shelves, etc.
  • While investigating workplace incidents, the “5 Whys” could be used to get down to the root causes of the accident and make improvements to prevent the error from occurring again. But remember, almost all system failures result from a combination of a number of factors and failures. You must continue to probe the circumstances, rules, policies, and people around the incident to search for all of the root causes.
  • Error-proofing can be used to avoid or prevent safety hazards.
  • Having “a place for everything and everything in its place” ensures that items are put back where they belong, and can be put back in a safe location.
  • When process mapping, safety risks can also be identified as improvement opportunities so that these risks can be mitigated.
  • Tracking  metrics related to safety can help identify any trends that may exist regarding safety incidents in order to identify opportunities for improvement.
  • Standard work can be created for workplace safety procedures in order to ensure that the task is completed safely each time.
  • Safety topics, recent safety incidents, and safety metrics can all be discussed in daily team meetings to increase safety awareness.
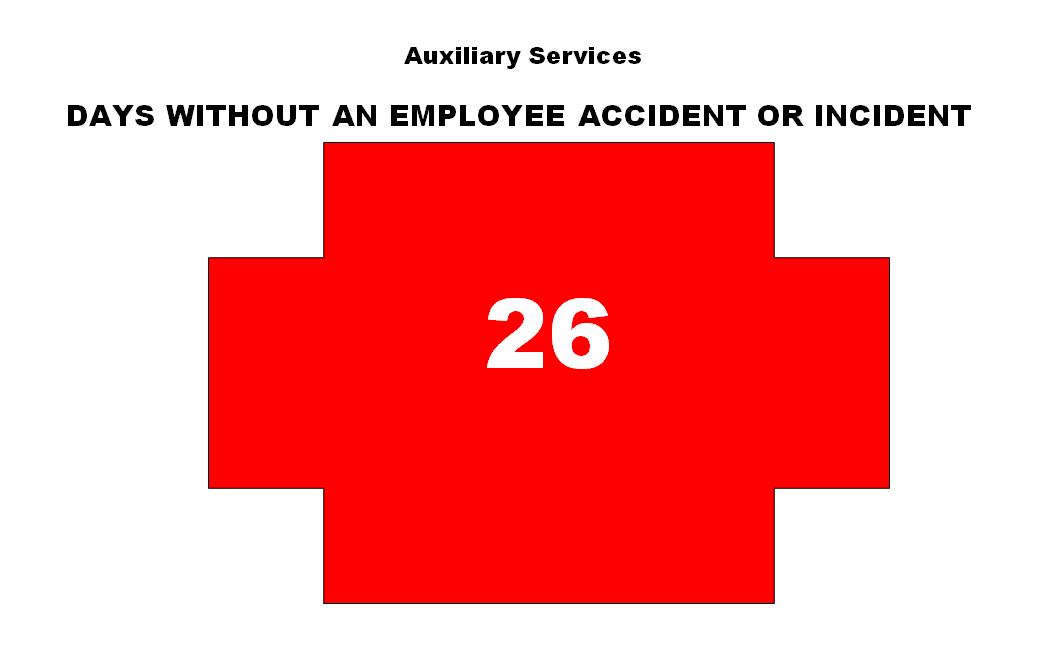
Example safety metric.

Those are a few examples of how an organization can make safety a part of their Lean culture. Keep in mind, a successful safety culture requires the same management support and participation as successfully making Lean a part of your organization’s culture!

Andon – Not Just Pulling a Cord

One of the pillars of lean thinking is Jidoka.  Lean Lexicon defines Jidoka as “Providing machines and operators the ability to detect when an abnormal condition has occurred and immediately stop work.  This enable operations to build in quality at each process and to separate men and machines for more efficient work.”  Within Jidoka, andon is the visual management tool used as the signal to call for help and stop production when that abnormal condition is recognized.

Some of the requirements for this type of visual management include

  • Standardization – the process must have a standard so that the operator or machine knows when an abnormal condition exists.
  • Easy to understand – the signal must be easy to understand without too much training.  If it gets to complicated people are spending more time figuring out what the signal means than improving quality.
  • Commonly used – the system must be commonly used within a work group.  If only a few people in the group are using it, it will not be effective.
  • Standard responses – when the signal is indicated those responsible for correcting the issue must know how to respond to avoid confusion and reduce downtime and waste.

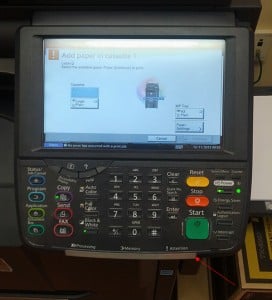
I tend to think of andon as the worker on a factory line pulling a cord to stop production, but it can also be an automated system or in an office setting.  As I was preparing a teachback on andon for a department report out the office printer started beeping and blinking.  I immediately got up, glanced at the screen and grabbed a new ream of paper to put in.  When I got back to my desk it hit me that this was an example of andon.  The printer encountered an abnormal condition (out of paper), stopped production (my print job was on hold), and indicated the problem through the flashing light and beeping.  On the screen is exactly what the problem is and the steps you would need to take to correct it.

Another example of an automatic andon is the low fuel light on your vehicle.  The light is the indicator and you, as the operator, know you should go to the gas station and fill up the tank to correct it.  There are more examples of andon around us than my originally narrow view of them thought!