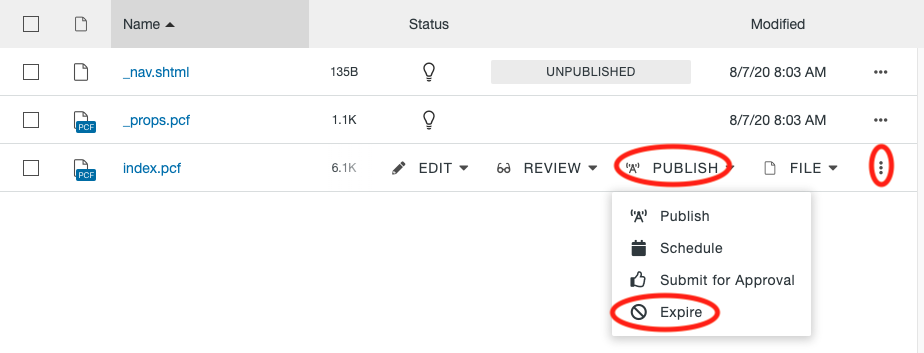
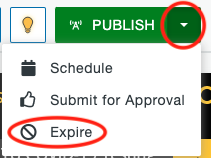
You can schedule a page to expire at a specific date and time. The available options depend on the file type and your access permissions. Expire options can be reached from the Pages List View by opening the More Actions menu and selecting Expire under the Publish dropdown or from the dropdown arrow next to the green Publish button when you have the page open.
There are different options for expiring content, Replace or Recycle. For each option you have the ability to send a notification to yourself or a group of users. It will be sent with the CMS and you can select the Send Copy to Email checkbox to also send a notification to the user’s Michigan Tech email. You will select the To from the dropdown, enter a Subject, and enter a Message.
Before removing any page you should first check its dependencies.
Check Dependencies
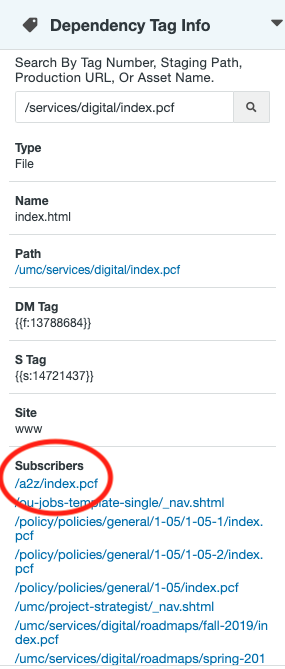
Before recycling or deleting content, you should always check to see what other pages or files are linking to that content. You can do this with the Dependency Tag Info sidebar gadget.
- In Pages List View, go to the folder where the page or file can be seen on the screen.
- Open the sidebar gadgets using the plug icon in the upper right corner.

- Open the Dependency Tag Info gadget.
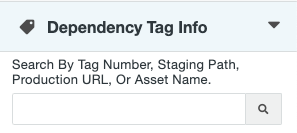
- Type the name of the file you want to remove in the search box. For example, if you wanted to check on https://www.mtu.edu/umc/services/digital/, from within the /umc/services/digital folder you would search for index.pcf.
- Click the search icon.
- Information about the item will show up below the search box. For personnel items, be sure to click on the .html link to see the correct dependencies.
Subscribers are any other files in the CMS that are linking to the file you searched. Be sure to update those links or contact the web liaison for the site to let them know the page is being removed.
- If the Subscribers says “None” you can continue with the recycle process.
- If there is nothing listed, there are likely too many to display in the gadget. The full list of linking pages will show up after you first select Move to Recycle Bin.
Schedule Expiration
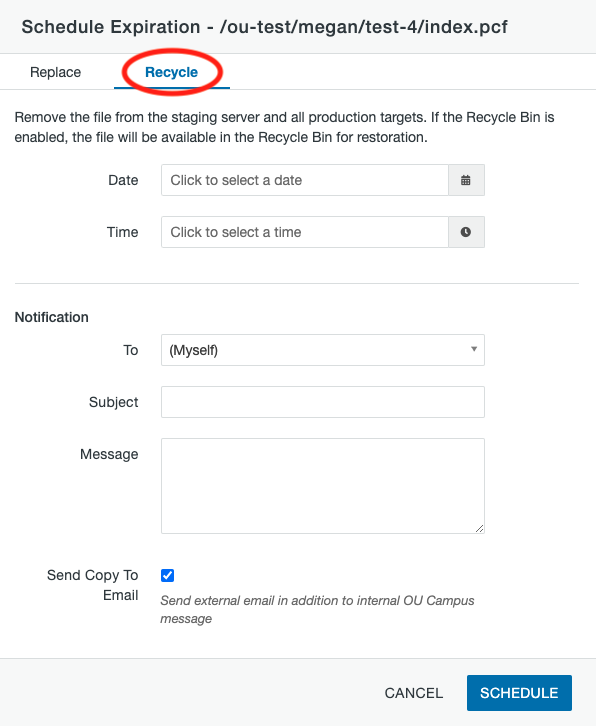
Recycle
Selecting this option will schedule the file to be removed from the site and put it in the Recycle Bin, which can be restored if needed.
- Date: The date you want the page to expire on. Click in the date field or on the calendar icon for a date picker or enter the date in the field manually.
- Time: The time at which the expiration will take place. Click in the time field or on the clock icon for a time picker and click the arrows to set the hour, minute, and AM or PM or enter the time in the field manually.
- Notification: Information for the notification.
- Click the blue Schedule button when you are done.
Replace
You should not use this option. Only use the Recycle option.
Redirect
Once your page is expired, people with the link bookmarked will get a 404 broken page error. Google will also still have the page indexed and it will show up in search results for up to a few weeks.
To avoid this issue, you should request a redirect. When a redirect is in place, anyone going to the old, recycled URL will be automatically moved to a different, working URL.
To have a redirect put in place, please email webmaster@mtu.edu with the old URL that you have recycled, the new URL that it should be redirected to, and the date and time you have set it to expire.
