Organization officers have the ability to create elections within their organizations. To create an organization-based election, follow the instructions below.
Defining Election Parameters
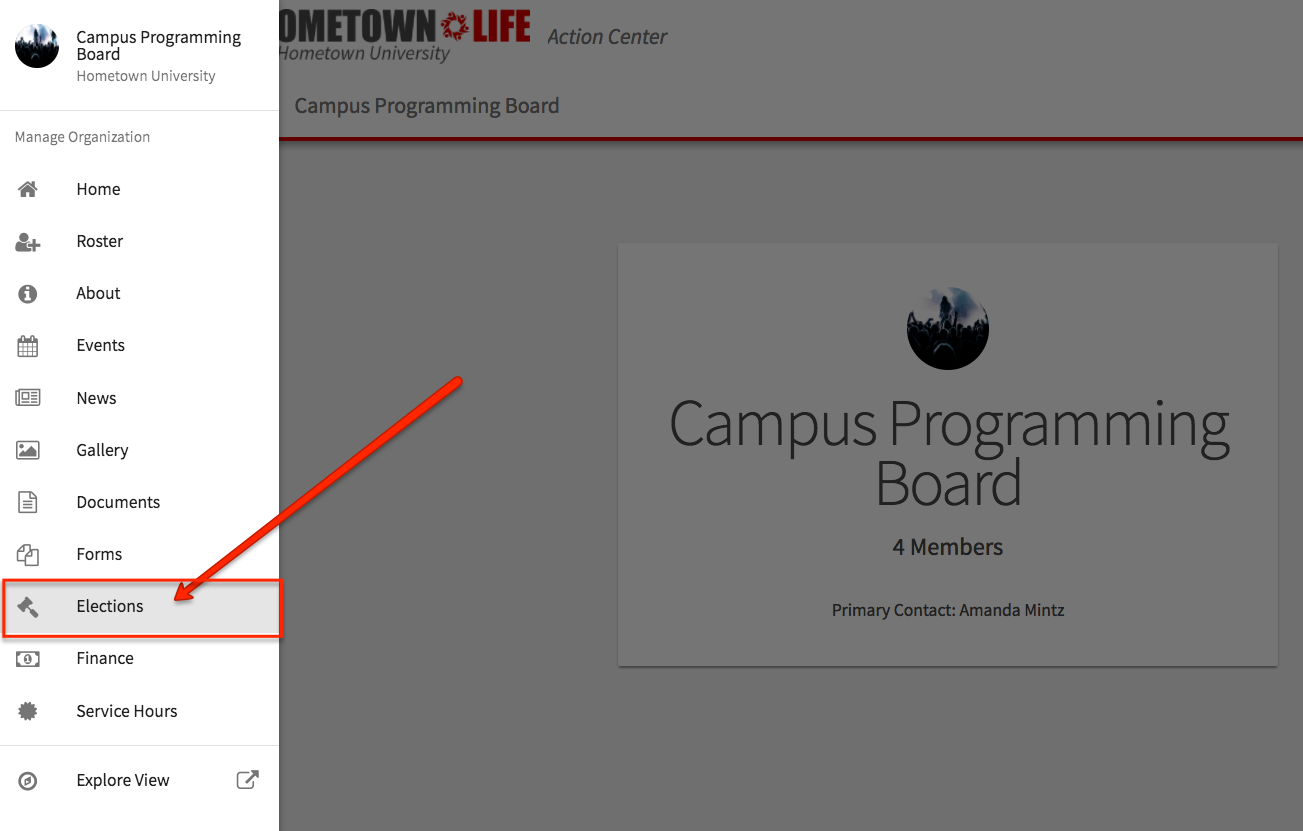
Head to the Action Center for your organization, and then click on Elections in the organization tool drawer. If you do not see this tool you do not have access to manage this tool for your organization. From here, click the Create Election button.
Identify the Name of the election, if it should include instructions and any additional (custom) instructions that should be included.
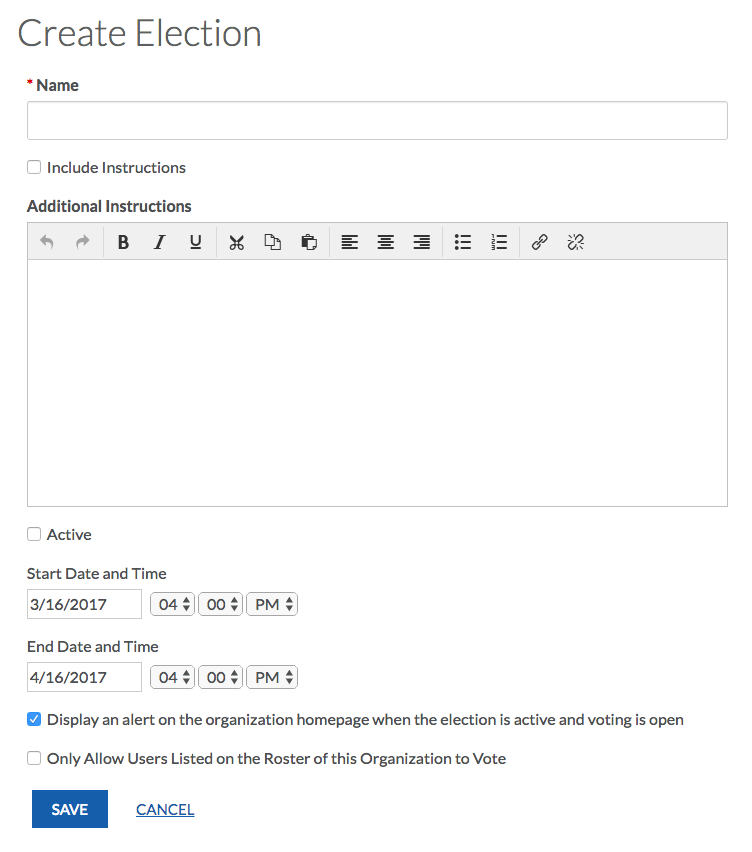
Below that, you can choose if your election should be active and the date range your election should be available. When the election is set to Active and it falls within the date range, users will be allowed to access the ballot.
You can also choose to display an alert on the organization’s homepage when the election is active and voting is open by checking the next box. The last option is whether or not to allow users outside your organization should be allowed to vote in the election– checking the box will limit it to only users within your organization roster.
When you’re finished with these settings, hit Create.
Setting up the ballots
You can create as many ballots as needed. Each ballot can be accessible to the general user population or any number of eligibility lists. A user will see each ballot they are designated to see. To start creating your ballots, click Create Ballot.
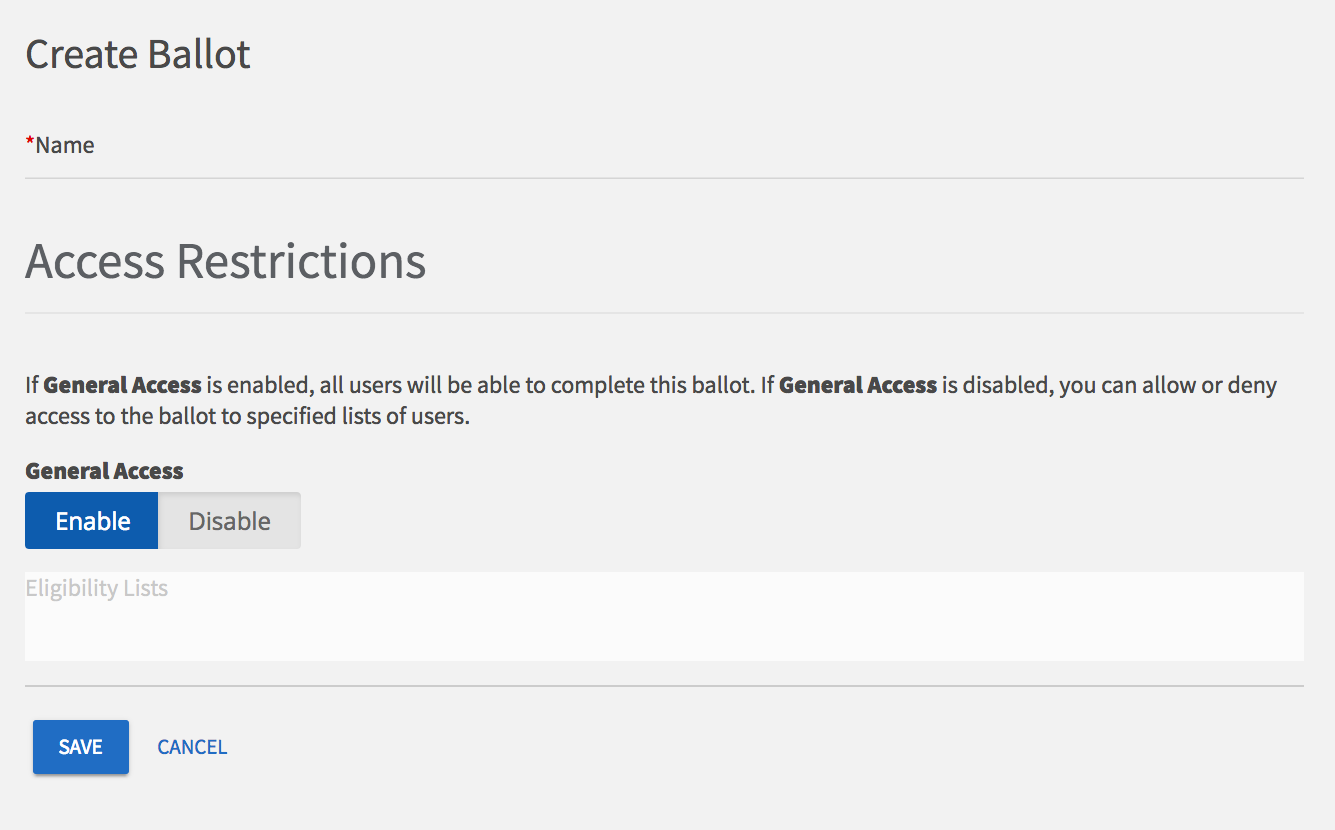
Enter the name of your ballot, then determine if the ballot should be general access by selecting Enable or Disable. If you select Disable, you’ll be prompted to enter settings for each of the available eligibility lists.
Eligibility lists are set up by campus administrators and are shared to organizations. If you are not seeing an eligibility list that you expect to see, contact your campus administrator.
| Setting | Definition |
|---|---|
| Allow | Users on the list can access the ballot |
| Deny | Users cannot access the ballot, and supersedes being on an allowed list |
| Ignore | List will not be used for the ballot, users cannot access the ballot |
Once you’re fine with your eligible users access, click Create to advance to the next page. You’ll now be taken to the form builder with a limited selection of question types.
Please see Form Building for complete instructions on creating or editing questions. The builder will automatically save your progress as you create questions. At any time, you can revise the title and access of your ballot by clicking Form Properties in the upper right corner.
When you’re finished, click Back to Ballots in the upper left corner. Repeat this for any additional ballots you need to create within the same election. Once all your ballots are ready, be sure to set your election to Active to ensure users can vote when the election starts, and the prompt to vote will display on your organization homepage if requested.
Seeing the Election Results
Navigate to your organization’s Action Center through the Manage view of your switchboard. Open up the organization tool drawer and select Elections.
Select the election you want to view. From there, you can click on the Results tab to browse the ballot results.

You can select the “Export All Votes” button to download your results into an excel file or you can view the snapshot of the current results displayed on the “Results” page. Click on a specific ballot in order to view individualized ballot response counts. The option to Export All Voters will only appear for community administrators and will not appear for general organization officers.