Month: September 2020

GivePulse Volunteer Database

GivePulse is an online community enabling everyone to list, find, coordinate, and measure their impact in the community. Whether you are a volunteer, student, faculty, donor, or community member, GivePulse provides a platform for all to logistically manage and coordinate experiences and tracking. GivePulse allows you to understand the impact you have on the community.

Creating Your User Account

There are two main ways you can log in and create your User Account on GivePulse.

The first way is through Involvement Link.

Log in to Involvement Link

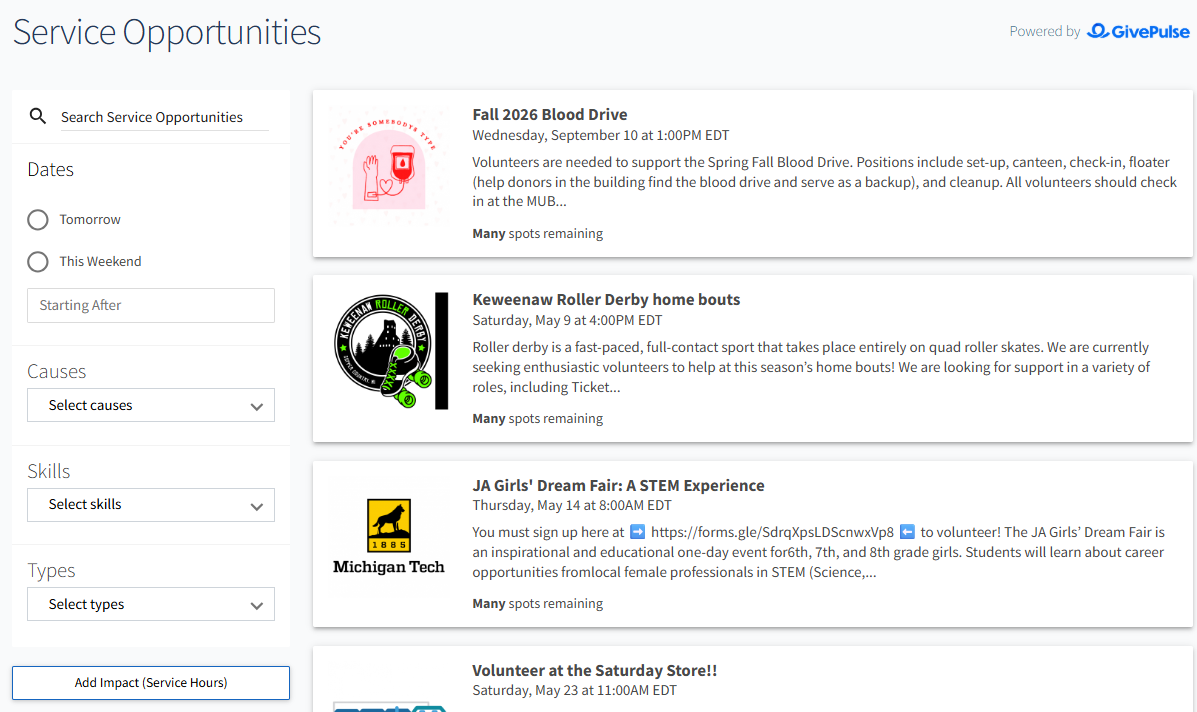
Click on the Service Tab
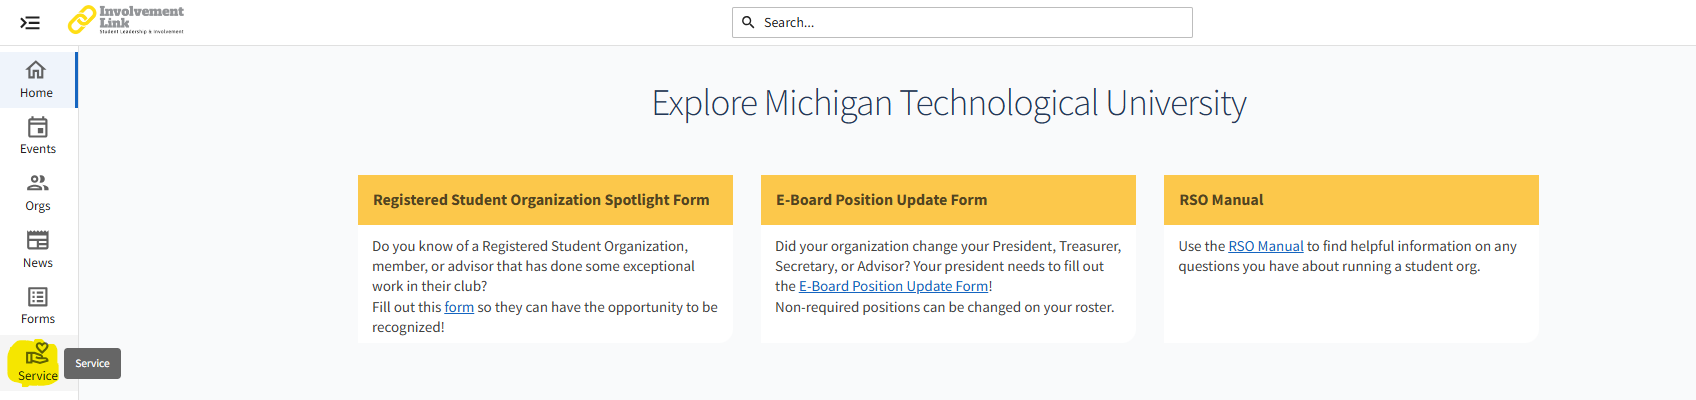
Service Opportunities will be published from GivePulse on Involvement Link. You will be able to search by date, causes, and type. Click on the opportunity you are interested in registering for and you will be brought the GivePulse Database. First-time users will be prompted to set up their user account.

The second way to create your account is by going to mtu.givepulse.com on your web browser.

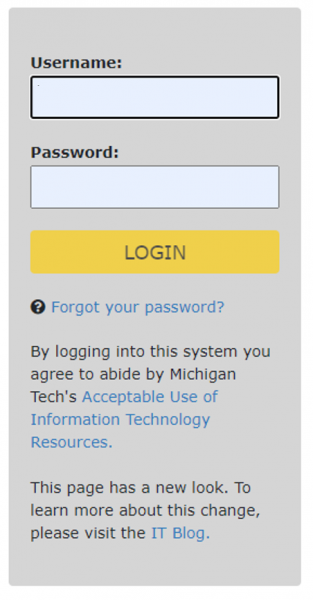
Click Log in via MTU
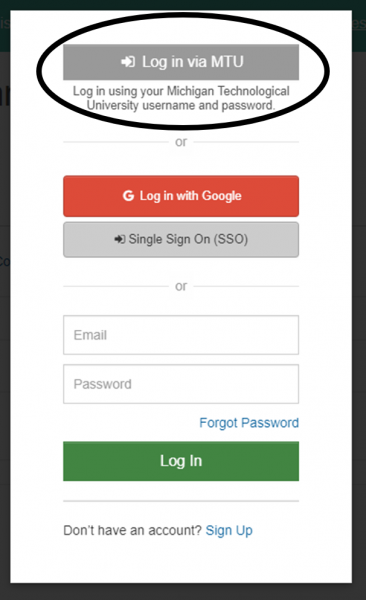
Sign in with your Michigan Tech ISO and password.

Registering for Volunteer Opportunities

Once your user account is set up with GivePulse, you can start registering for events/volunteering opportunities.

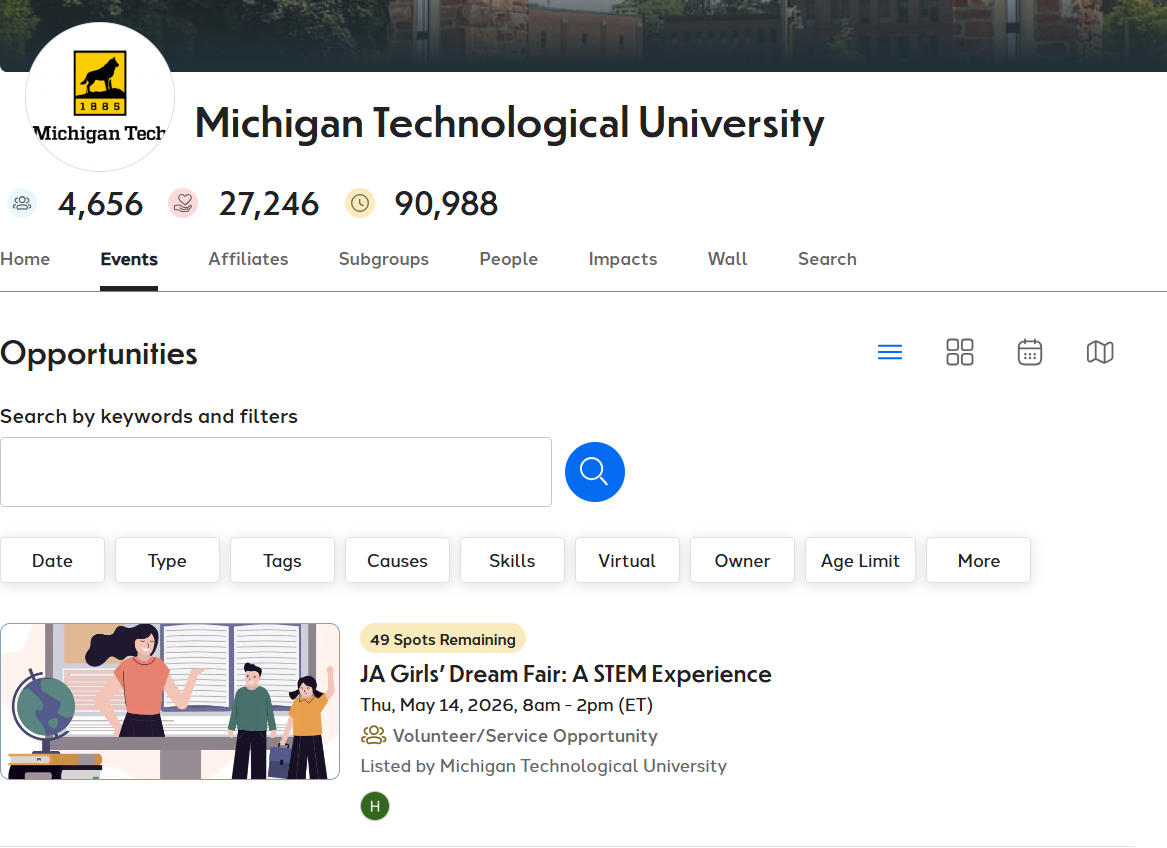
Find the opportunity you would like to volunteer for and click the green Register button. Depending on the opportunity you may need to answer different registration questions. You will receive an email once you have completed registering.

Impacts

Impact is the term used to describe all the potential ways you will be engaging with the community. An impact can be funds donated, funds raised, goods donated, hours trained, or volunteer hours served.

Whether you have served your community at an event you found through GivePulse at Michigan Tech or you volunteered on your own, you can track your impacts.

Log in to your GivePulse Account and click the green Add Impact button. This is your opportunity to reflect and track on your community engagement experience.

Hosting Your RSO Elections on Involvement Link

Organization officers have the ability to create elections within their organizations. To create an organization-based election, follow the instructions below.

Defining Election Parameters

Head to the Action Center for your organization, and then click on Elections in the organization tool drawer. If you do not see this tool you do not have access to manage this tool for your organization.  From here, click the Create Election button.

Identify the Name of the election, if it should include instructions and any additional (custom) instructions that should be included.

Below that, you can choose if your election should be active and the date range your election should be available. When the election is set to Active and it falls within the date range, users will be allowed to access the ballot.

You can also choose to display an alert on the organization’s homepage when the election is active and voting is open by checking the next box. The last option is whether or not to allow users outside your organization should be allowed to vote in the election– checking the box will limit it to only users within your organization roster.

When you’re finished with these settings, hit Create.

Setting up the ballots

You can create as many ballots as needed. Each ballot can be accessible to the general user population or any number of eligibility lists. A user will see each ballot they are designated to see. To start creating your ballots, click Create Ballot.

elections1.png

Enter the name of your ballot, then determine if the ballot should be general access by selecting Enable or Disable. If you select Disable, you’ll be prompted to enter settings for each of the available eligibility lists.

Eligibility lists are set up by campus administrators and are shared to organizations. If you are not seeing an eligibility list that you expect to see, contact your campus administrator.

Setting Definition
Allow Users on the list can access the ballot
Deny Users cannot access the ballot, and supersedes being on an allowed list
Ignore List will not be used for the ballot, users cannot access the ballot

Once you’re fine with your eligible users access, click Create to advance to the next page. You’ll now be taken to the form builder with a limited selection of question types.

Please see Form Building for complete instructions on creating or editing questions. The builder will automatically save your progress as you create questions. At any time, you can revise the title and access of your ballot by clicking Form Properties in the upper right corner.

When you’re finished, click Back to Ballots in the upper left corner. Repeat this for any additional ballots you need to create within the same election. Once all your ballots are ready, be sure to set your election to Active to ensure users can vote when the election starts, and the prompt to vote will display on your organization homepage if requested.

Seeing the Election Results

Navigate to your organization’s Action Center through the Manage view of your switchboard. Open up the organization tool drawer and select Elections. 

org_election_results.png

Select the election you want to view. From there, you can click on the Results tab to browse the ballot results.

org_election_results_2.png

You can select the “Export All Votes” button to download your results into an excel file or you can view the snapshot of the current results displayed on the “Results” page. Click on a specific ballot in order to view individualized ballot response counts. The option to Export All Voters will only appear for community administrators and will not appear for general organization officers.