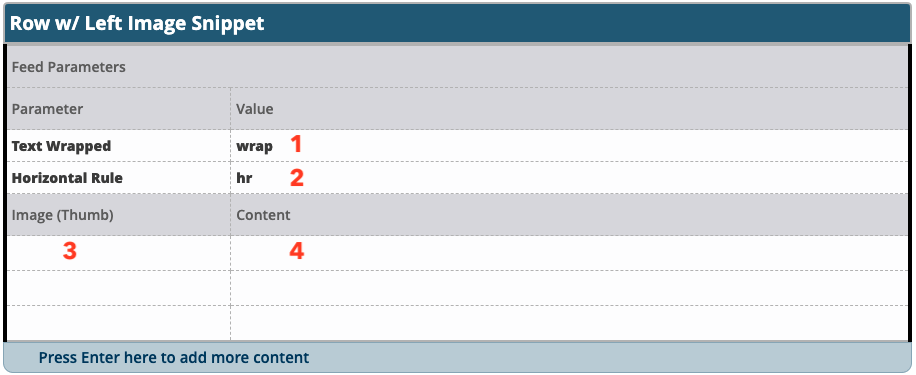
This snippet creates a layout with an image or an image and text on the left and heading/text on the right. You can choose whether or not to wrap the text on the right around the left content and whether or not to include a horizontal rule on the last item in the snippet.
View row with left image in the Style Guide.
- Select whether you want the text on the right to wrap below the image/text on the left (Text Wrapped) or not (No Text Wrap).
- When using in an asset you must type in the desired option, “wrap” to have the text wrap or “nowrap” to not have it wrap.
- Select whether you want a horizontal rule (a line) after each of the rows or not.
- When using in an asset you must type in the desired option, “hr” to include the line or “none” to not have a line.
- Insert an image, either square170, square250, or personnel170 image into the Image field. If you include text after the image you must use a square170 or personnel170 image. You can also insert a video snippet with a width of 170 or 250.
- Enter a heading (if desired) and the content for the right side in the content field.
Each row of the snippet will create a formatted row. To add more than three rows, press tab to get additional rows in the table. You can also right click, Row, Insert Before or Insert After to add a new row between existing rows.

